Deep Neural Network from Scratch in Rust 🦀 : Part 1- Basics of Neural Network


Introduction
Hi there! I'm excited to share with you my latest blog post on building a Deep Neural Network from Scratch in Rust. In this series of about 5 parts, I'll take you through the basics of neural networks and show you how to implement them using Rust programming language.
As a machine learning enthusiast, I have always been fascinated by the inner workings of neural networks. While there are many high-level libraries that make it easy to build neural networks, I believe that understanding the fundamentals and building it from scratch is essential for mastering the concepts.
In this tutorial, I will guide you through building a neural network model step by step, explaining each concept along the way. We'll start with a brief introduction to neural networks and then dive into the Rust programming language, which is known for its performance, safety, and concurrency.
Whether you're a beginner or an experienced developer, this tutorial will help you gain a deeper understanding of neural networks and their implementation in Rust. So let's get started!
Why Rust is a Good Choice for Building Neural Networks
Rust is a good choice for building neural networks from scratch because it offers several advantages, such as:
Safety 🛟: Rust is a systems programming language that guarantees memory safety and prevents common errors like null pointers, data races, and buffer overflows. This makes Rust code more reliable and secure, which is important for neural network development.
Performance ⚡ : Rust is a compiled language that produces fast and efficient binaries that can run on various platforms. Rust also supports parallelism and concurrency, which can speed up neural network training and inference. Rust can also leverage GPU acceleration for high-performance computation.
Expressiveness 🧑: Rust has a rich and elegant syntax that allows developers to write concise and readable code. Rust also supports macros, which can simplify the definition of neural network architectures using crates like BURN. Rust also has a powerful type system and trait system, which can help with abstraction and generic programming.
Ecosystem 🦀 : Rust has a growing and vibrant community of developers who contribute to the development of various crates and tools for neural network development. Some of the popular crates include BURN, autograd, tract, tch-rs, and RustNN. These crates provide robust support for building and training neural networks in Rust, as well as running pre-trained models from other frameworks like PyTorch and TensorFlow.
In summary, Rust is a good choice for building neural networks from scratch because it combines safety, performance, expressiveness, and ecosystem uniquely which makes neural network development easier and more enjoyable. But in this series, we are not going to use any off-the-shelf Rust crates like BURN and tch-rs, but we are going to build our own neural network library from scratch to promote first principles thinking.
Basics of Neural Network
Alright then now that we know why we are going to use Rust for this build, let's get into the inner workings of a Neural Network. We are going to keep this very brief.

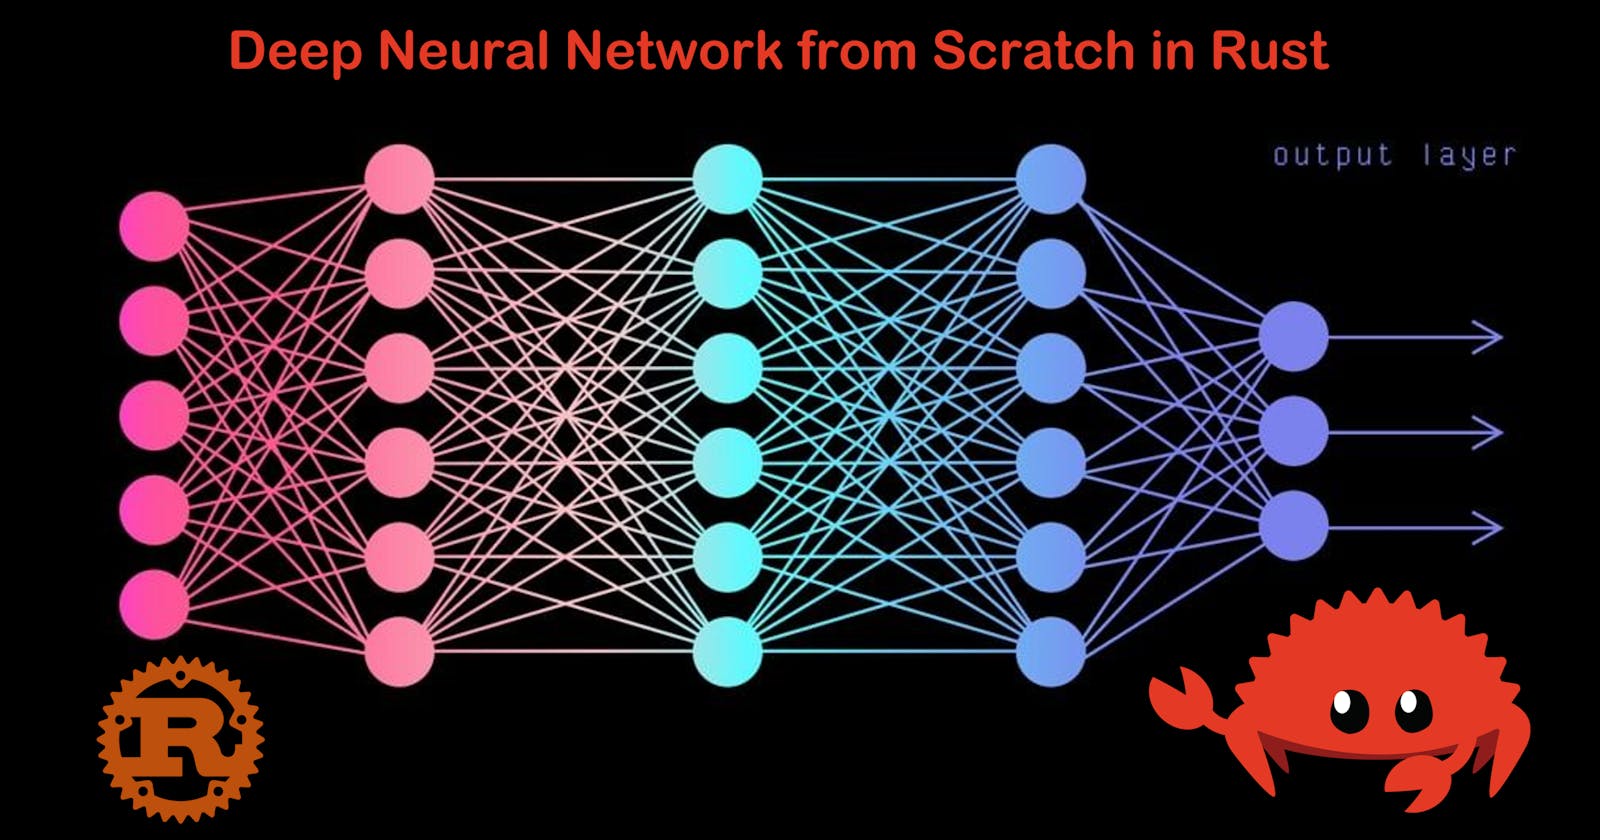
A basic fully connected neural network architecture consists of three key elements:
Input Data: This is the initial information or data fed into the neural network for processing.
Hidden Layers: These layers are where the computation and transformations take place. Each hidden layer comprises numerous perceptrons, which are the individual units responsible for processing and transmitting the information.
Output Layers: The final layer of the neural network produces the desired output based on the input data and the computations performed in the hidden layers.
In a neural network, each perceptron within the hidden layers has its own unique set of parameters: weight (w) and bias (b). These parameters determine the relationship between perceptrons in different layers. When a neural network is initialized, the weights are set randomly and the biases are initiated as zero. However, during the training process, these values are continuously adjusted to optimize the network's output and align it as closely as possible with the true labels.
The training of a neural network generally follows the following steps:
Input Data to the First Layer: The initial data is fed into the input layer of the network.
Forward Propagation: The data is then propagated forward through the hidden layers, with each perceptron performing computations and passing the output to the next layer.
Prediction: Once the data has traversed all the layers, the neural network produces a prediction based on the computations performed.
Cost Calculation: To evaluate the accuracy of the prediction, a predefined loss function is used to calculate the cost or error.
Backward Propagation: The network then performs backward propagation, calculating the gradients for each layer. This process involves assessing the impact of each perceptron's output on the overall error and adjusting the weights and biases accordingly.
Gradient Descent: With the gradients calculated, the network employs the gradient descent algorithm to update the weights and biases, gradually minimizing the cost.
Repeat Steps 1-6: The previous steps are repeated iteratively until the cost reaches a satisfactory level, indicating that the network has learned the patterns and relationships within the data.
By following these steps, a neural network can learn from examples and improve its performance over time, making it a powerful tool for various applications. Through the whole series, we will dive deeper into each step of the shown process and then write Rust code to implement the algorithms. In the next part, we will initiate the rust project, load our data and initialize our neural network model.
In this series, we are going to create a Rust-based Neural Network library or crate in Rust terms. Using this library, we will build an application to create a binary classifier to classify... you guessed it right... Cats 🐈.
I hope this series will make your foundations in neural networks stronger, and at the same time introduce you to some concepts of the awesome Rust programming language. Sit tight and join the ride.
Follow me on Twitter to get updated when the next part comes out. In the next part, we will load the data and initiate our model.
Want to Connect?
My Website
My Twitter
My LinkedIn